Thursday, April 25, 2019

Continued work on the chassis, battery and fuel tank overflow

We continued work on the chassis.  The battery arrived and we installed the battery tray and battery.  Additionally added the very rare fuel tank overflow nozzle. 


The chassis is coming along well.  The FI has been installed (rebuilt by John DeGregory) and the correct dated battery arrived.

Super rare fuel overflow nozzle for the smaller hose that was on 1963 Corvettes. You typically see the replacement wider hose.  Original Vettes had a smaller 1/4" line that was typically replaced due to clogging.


Wednesday, April 24, 2019

Time to bolt the engine and transmission on the chassis

Today we bolted on the FI unit and bolted in the engine and trans assembly on the chassis.  Next week, we'll bolt on the body...it'll soon be completed.


Monday, April 22, 2019

Painting the engine

Everything is bolted on (except the intake) and we painted with lots of overspray, just like the factory.

Yep, lots of paint on those exhaust manifolds.  That will burn off fairly quickly.  

Water pump...we did cover the timing cover with some paint as well, although in the factory, the engine was painted with the water pump bolted on, so the timing cover didn't get a lot of paint.  We painted lightly to help prevent rust.

View from the rear of the engine, bell housing has engine paint on it as it was bolted on when the the engine was painted.


We had temporary valve covers on the motor for painting.

Water pump bypass host also was painted in the factory.

Wednesday, April 17, 2019

Finishing bolting on parts to the engine

Just a few more items to bolt on to the engine.  The intake and the exhaust manifolds.  We're working on that today.


The exhaust manifolds, ready to be bolted on.

After bolting on the exhaust manifolds and the water pump, the engine will be ready for paint.

Friday, April 12, 2019

Windows installed in the doors

Dan completed installing the glass in the doors of the body.  The glass is so clear it's difficult to see it in the door.


Wednesday, April 10, 2019

Chassis almost complete, April 10, 2019

After 6 days reconditioning parts, ensuring we had the original and  correct nuts/bolts for the chassis, i started to bolt on the chassis components (of course with the help of Pat and Andrew at Tony's Corvettes).  The photos below describe some of the components bolted on.


Still needs completion of the brakes and some of the front suspension, but we made quite a bit of headway this week.

Another picture of the front end without me in the picture.  :)

Rear of the chassis, Andrew working on the control arms in the front.

Demonstrating how the lower control arm ball joint cotter pin is properly bent with a deep socket.

Lower ball joint completed cotter pin.


Setting up the spring compression tool.

Original mounting block for the control arm.

These are the nut on the control arm that are unique and difficult to find.  The example on the right is easier to see the 3 triangles on the nut.  In addition, these are typically copper plated.  The one installed is black phosphate coated. I'm working on getting copper plated originals.

One item I added this week was the factory paint marks on a number of the components.  Here the green paint is typical for the steering box for 1963 Corvettes.

The cotter pin in the end of the relay rod.

Blue paint daub on the front left spindle.  The photo below has the green paint daub on the right spindle.  Note that this is a Z06 car and the colors are the opposite for Z06 cars vs non-Z06 Corvettes.

The green paint daub on the front right spindle.

Blue paint daub on the top "hat" of the rear shock.

Tie rod ends.  You can tell these are original 1963 Corvette tie rods by the hump just before the threads.

Andrew working on bolting on the elephant ears on the front brake backing plates.

Front backing plate with the "C" pin which are just about impossible to find.

Tuesday, April 9, 2019

Chassis work continues - April 9, 2019

I've been working all week on the chassis.  With researching, and taking care to prep and paint the parts correctly, with the correct bolts/nuts, washers, all to install just as it came from the factory...it takes a lot of time.  Tony and I arrive at 7am and leave at 8 or 9pm everyday.  He's some progress through Tuesday, April 9, 2019:

Chassis installed: Rear, half shafts, shocks.

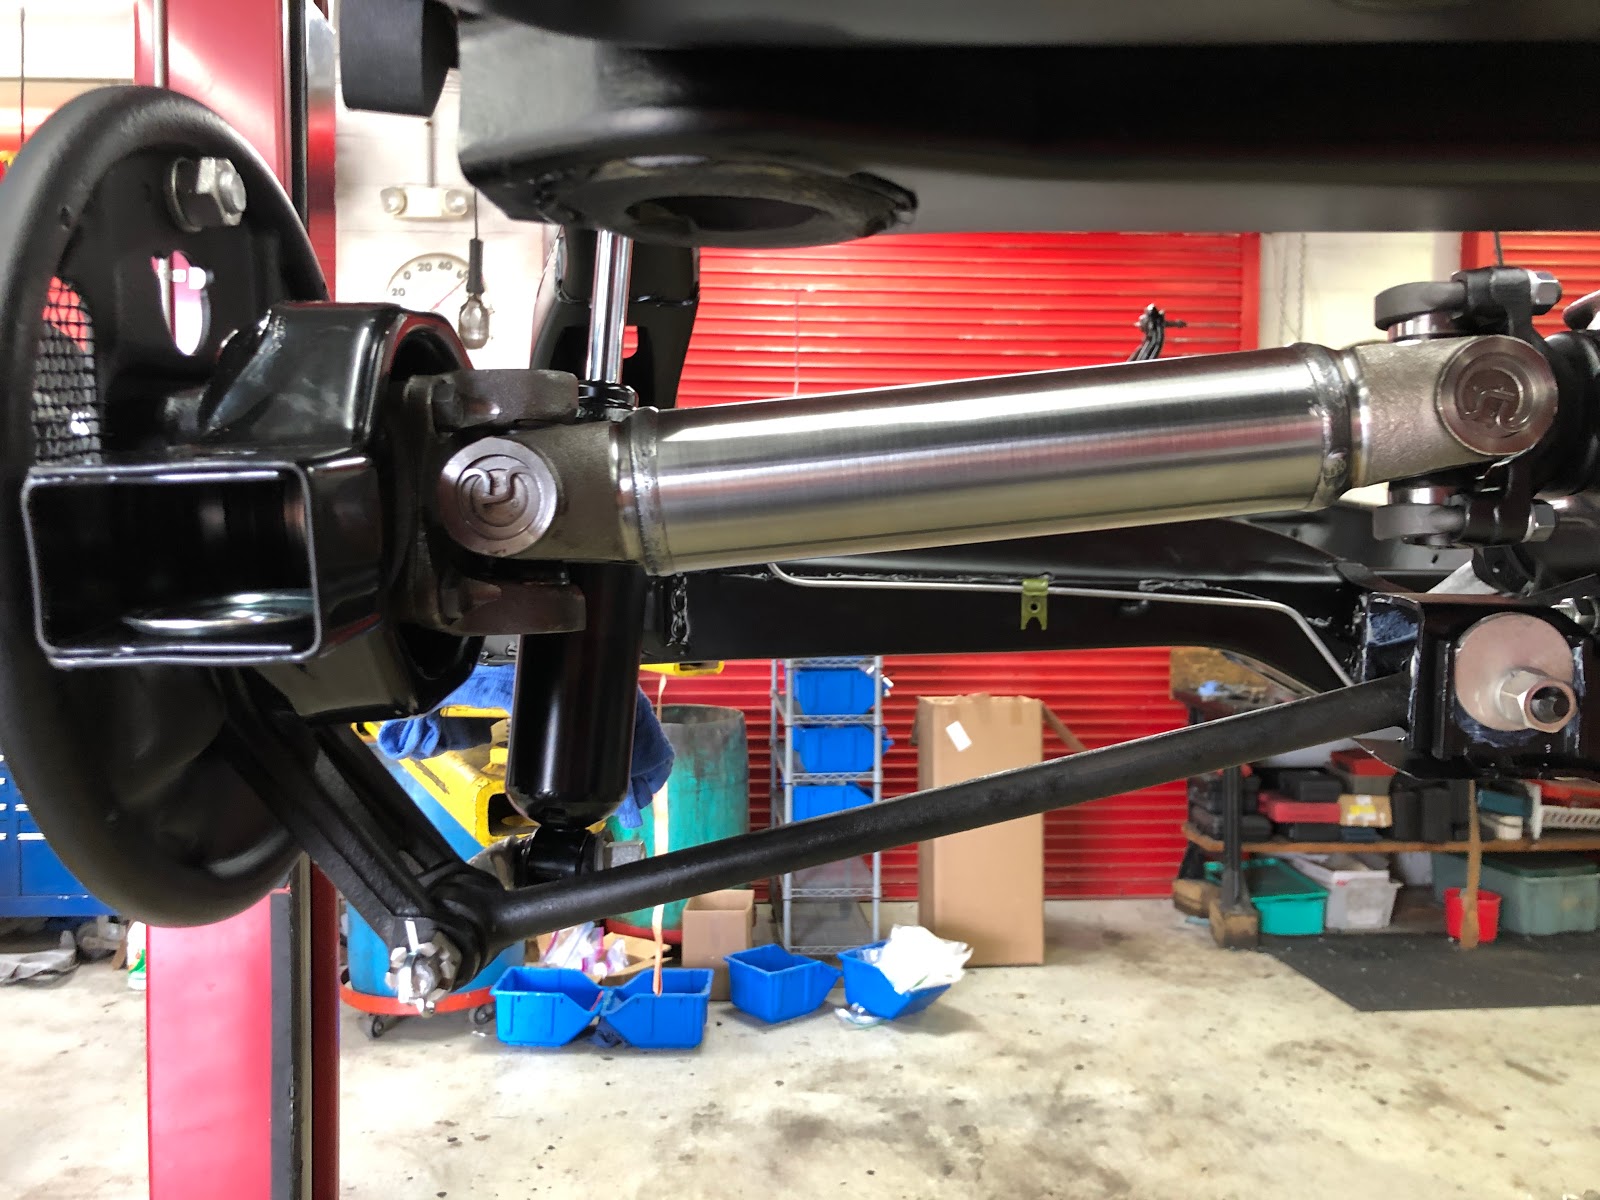
A closer look at the half shaft, shocks, etc.

Lining up the fuel tank.  Notice the anti-noise strip under the tank...glued to the tank vs the frame per review of a couple of original 1963 cars.

Tank and fuel neck is in and strapped down.

Rear leaf spring bolted and in place.  Painter grey with the black plastic liners.

Installing the bushings in the lower control arms with Andrew at Tony's Corvettes.

Andrew mentioned that the bushings went in rather easily...as these lower control arms were very straight.  Not typical, usually the control arms are slightly bent and makes it a challenge to get bot in...it only took about 5 min to get both lower control arms completed.

Saturday, April 6, 2019

April 2019 - engine compartment and under the body update

A view of the engine compartment with everything in place prior to setting on the chassis.


For this restoration we primarily restored existing components and even installed rare and tough to obtain original parts.  For example, the clear wire tab at the upper center of this photo is an original (as well as the others on this fire wall.  These originals and non-discolored are found under the dash of some cars.

See the fiberglass fender, still mostly fiberglass with little blackout.

The ceramic wire block on the upper right is original with the blue line intact.

Wiper motor and Z06 power brake booster are original reconditioned.

Original horns.  Also notice the dry paint coverage of the valence panel...just like factory.

The wire clip on this harness is original.  We also used original wire harnesses where possible.

Original wire harness clip (black, upper center) and notice the hood with red primer. This was typical in the factory as the car was painted with the hood on the car. 


The staples on the fender wells are properly rounded unlike the reproduction dust shields.

Z06 F lettering and the #6 job.  This is under the passenger side foot well.

Original wire harness clips in the rear of the body.

These are all original speed nuts on the emblem on the rear deck.